Thursday, October 31, 2013

Shabby Chic Coffin - Happy Halloween **Flamingo Scraps**

 I love Halloween for the fun you can have with the dark and macabre, shakes things up a bit.  So with that in mind......

Happy Halloween everyone!!

 I made a little present coffin box and dressed it up with a little shabby chic-ness, why not dress up dark and sinister ;).  The coffin opens up and cackles at you, so I thought why not decorate it (it was just plain wood).


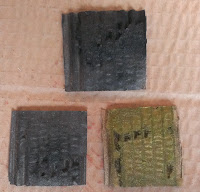
I sprayed the entire box with 3 colors of Heidi Swapp Color Shine (Georgia peach, Black Velvet, and Chartreuse).  I layered the misting (letting some dry before adding on another layer of spray), plus I also added in some layers of Claudine Hellmuth Studio paint (in similar colors of green, orange, and black).  I then let it all dry before adding on the Halloween Washi tape - Beware of what might lurk inside!!


 Here you can see I used a stencil (you can special order items like the stencils, paint, etc from Flamingo Scraps) to added a layer of Claudine Hellmuth gesso mixed with slow drying medium to create texture.  After it all dried hard I sprayed with the color shine colors again.  I then added in my Prima flower cluster (some also sprayed with color shine to match - the black and green flowers are sprayed ones), and my cute little black spiders from my stash.

You can find most of these supplies over at Flamingo Scraps!!

Now to just enjoy the goodies inside - all while the little coffin cackles at you for eating your sweets!!

Supplies
Wood Coffin - recollections
Flowers - Prima
Mist - Heidi Swapp
Mediums and Paint - Claudine Hellmuth
Spiders - recollections
Washi Tape - JoAnns dollar bin
Stencil - Studio Calico
Enjoy!!


Tuesday, October 29, 2013

Pumpkin Pops **Flamingo Scraps**

Every year for Halloween I am always on the lookout for a cute little gift I can give to my kids friends (school, neighbors, etc).  I have seen the ghost pops so many times (take a sucker and wrap a white paper towel the sucker, tie a black ribbon around the bottom, give it eyes, and you have a ghost) that i thought of trying to switch it up a bit.  I thought of pumpkins.  Invert them, make them orange, and poof pumpkin pops.

 You could give these out as kid gifts, teacher gifts, as place cards for a table setting, and as plain pumpkins they work for Thanksgiving too!!
 

Pumpkin Pop Tutorial

1) Supplies - Some form of a sucker (sphere not flat), paper towel, quick drying craft glue, tape, twine, black pen, green pen, orange mist, black mist, green mist, cardboard, and a flower.

2) Open up the paper towel or napkin to make a large square.  Spray the center with orange mist.  I used Heidi Swapps color shine in Georgia Peach.  Let it dry completely


3) Using a black pen or marker draw in the lines as seen below, make sure you napkin is dry first.  This creates the seems or ridges in your pumpkin.


4) Tape down the tops and secure the wrapper of the sucker before you cover it.  This helps the pumpkin not have lumps later, plus it gives the kids a bit more fun trying to open them up to eat them, lol.


5) Cover the sucker with the colored napkin and secure the bottom with twine, I used green, but any color you want will work.


6) Cut off the excess paper towel, but be careful not to cut off your twine or it will fall apart.  


7) After looking at the "pops" I thought the handle of the sucker acted as the stem of the pumpkin, and those are green.  So I colored the stick part with Chartreuse Color Shine and a green marker.  You should do this step before you wrap the napkin onto the sucker, so you don't mix your colors.


8) These would be cute just like they are at this point, but I thought pumpkins are not held stick "stem" down, but rather with the stem pointing up.  Alas suckers can't stand up on their own, so it needs a base!  Cut out squares of cardboard from a box, hey why not use the box your flamingo scraps goodies came in!!  Tear off the tops of the cardboard to expose some of the ridges.  Spray the cardboard in your choice of Mist   - black and green were my choices.  I then glued down a flower to each of the squares and sprayed the same color again to the flower would match.  The flower just acts as a "nest" so the sucker will not topple over when it is glued on to the base.


 9) Glue down your pumpkin pop to the center of the flowers, hold the stem for a sec so they will not fall over.  Leave your pumpkins "natural" or draw faces on them to make them Jack-o-lanters.  I even added a tag to one of the stems to make it a label with washi tape and wrote a name on it.


You can find the paper craft supplies at Flamingo Scraps, so head on over today and get yourself a fun Halloween treat!!


Supplies Used
Twine
Napkin
Pen
Washi Tape

Enjoy!!

Friday, October 25, 2013

so thankful - card **Flamingo Scraps**

I am always in need of cards, for lots of various reasons.  Right now it is a thank you for my son's teacher to show her how thankful we are to her (and the school) about his rough transition since the move.  They are helping him in so many ways, and we are grateful that they are supportive to his needs.


This is my creation made for the Flamingo Scraps F4 for October.  We were given various Prima Rondelle 6x6 Paper, Prima banner clip, Prima flowers, and a misc. packing tag.

I used 3 different sheets of Prima paper and cut them into 1.5 inch squares.  I then inked and arranged them as seen in the pic.  I matted them onto black, then another Prima patterned paper, then on the card base of kraft paper.    I cut the tag down to make room for the stamp sentiment, which I added the clip and a punched out butterfly from another sheet of the Prima paper.  I added a couple of extra flowers to bulk up the Prima flowers from the kit, then added int he buttons.  I created the leaves and you can see the tutorial I made in a post from last week.

For a tutorial on how I made the leaves please view my leaf tutorial.  For easy ways to make these cards please see my fast easy cards post.

Supplies Used
Patterned Paper - Prima
Cardstock - DCWV
Flowers - Prima and Recollections
Tag - other
Ink - Prima
Buttons - other
Adhesive - 3M
Punches - EK and Marvy
Twine - Recollections
Clip - Prima
stamp - Recollections

Enjoy!!

Tuesday, October 22, 2013

F4 sneak plus a Leaf Tutorial **Flamingo Scraps**

I am always on the lookout for a great leaf to go behind the flowers that I make or buy, but to buy a leaf seems pricy (but I still love the look of them).  So here are some easy quick steps to create leaves to fit behind your flowers.  FYI leaves really help give your flower clusters a pop, it gives everything better dimension.

Above you can see leaves I made using a different punch then below.

Handmade Leaf Tutorial

1) Supplies - flower punch, paper (usually green), ink (I like chalk ink by Prima), and scissors.

2) Punch out your flowers with your selected paper.  I like cardstock, but patterned paper works well too.  I like to use scrap paper for this in various shades of green, brown, orange, black, yellow, etc.  I picked a rounded flower for this leaf, but pointed or tattered flowers work great too.


 3) Cut our pairs of flower petals.  This creates a pair of leaves to go behind your flowers.  I find that pairs looks the best.  Single or triple leaves look odd to me.


4) Fold the leaf petals in half, this creates the seam in the middle of the leaf.  

 5) Using an ink color of your choice (it varies from black, browns, or maybe even a red or a yellow) it really all depends on the color of the leaf and the layout pallet, ink the edges of the leaf and also along the seam.  The fold the leaf back along the seam the other way so the leaf seam is inverted and the sides are out.


 6) Tuck leaves under flowers.  Easy!! 


Here is a sneak of my Oct F4 project using my leaf tutorial.  So come back on Oct 25th to see the final project!

Enjoy!!

Friday, October 18, 2013

"Fast" So Thankful - Cards **Flamnigo Scraps**

I don't always have 3 hours create cards for everyone.  Don't get me wrong, I love to create cards, but sometimes I like to whip them up fast.  In this instance I did a bunch of cards for a card swap for a new scrap group I went to.  We each brought in 7 similar cards, and got different ones back in return.  Here are my 7 cards.

 I used various 6x6 papers from Prima.  I used my square punch to cut them all out, then arranged them on the kraft cardstock base (6x6 base). I then used the same paper to punch out the flowers, butterfly, clouds, and cut the tag.  I stamped on the sentiment, glued down the squares, created the clusters, and added the buttons.  If you create these like an assembly line they go super fast.


 I created these cards with a sketch from Cardmaps (below)


I created a "deluxe" version of the card for the Flamingo Scraps Oct F4 using the same products and sketch, just ramped up.  I used the left over supplies from the F4 kit to create my swap cards.


You can purchase these supplies over at Flamingo Scraps.  There are tons of fun goodies to be found in the warehouse boxes they have on sale right now, so go over and check them out!!


Supplies Used

Sunday, October 13, 2013

DT Announcement!!

I am so happy that I was selected to be apart of a wonderful group of inspiring ladies!!


Share This

Related Posts Plugin for WordPress, Blogger...