Friday, January 16, 2015

Beautiful **Unique Laser Designs & Imagination Crafts & Paper House***

I love having tags on hand to add to presents instead of cards, and with all the little girl birthday parties I will end up going to I know this little beauty will come in handy to add to cute little gift we will give to the birthday girl.


I used the wonderful wood butterflies from Unique Laser Designs at the top of the tag.  They are just to cute and sweet and perfect for this little tag!  I love a plain look as seen below, but for this tag I wanted them to sparkle, but not too much.
http://www.uniquelaserdesigns.com/#!minis/c1qag


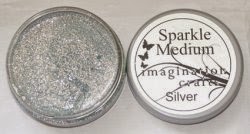
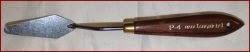
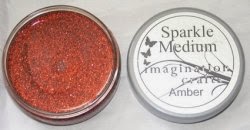
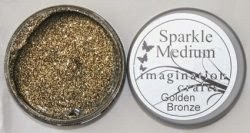
So I first pressed the wood into the embossing medium (like Versamark) to amek it "sticky" for the mica powders to stick.  I used a pale pink color to match the colors in the tag and just used a small dry paint brush to apply the powder tot eh sticky wood.  I used the wonderful mica powders from Imagination Crafts.


http://imaginationcrafts.co.uk/shop/index.php?main_page=index

The shine and shimmer is just beautiful when it is done, it just catches the light perfectly, and it will not rub off!!  There is no drying time so to make these little shiny gems is super easy and fast too!!


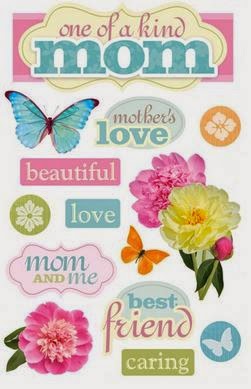
For the main part of the card I used the wonderful Paper House papers and stickers.  Their cute Little Girl Quilt paper just begs to cut cut apart and used for a tag, and the little Puffy stickers match perfectly.  I topped it off with a chipoxy "beautiful" sticker from the Mom sticker pack, but every little girl loves to be told they are beautiful!!


https://www.paperhouseproductions.com/https://www.paperhouseproductions.com/

https://www.paperhouseproductions.com/


Tags can be used instead of cards, so have fun making some tags for a change of pace!!

Supplies Used
Wood - Unique Laser Designs
Paper - Paper House
Stickers - Paper House
Mica Powder - Imagination Crafts
Cardstock - Kaisercraft
Ink - Prima & Tsukineko
Twine - American Crafts
Adhesive - Tombow
Trimmer - Fiskars
Enjoy!


Thursday, January 15, 2015

Peace on Earth **Birds of a Feather & Imagaintaion Crafts**

I wanted to make a winter card instead of a Christmas card this year.  This is the one I send out to all my friends and family digitally with our family newsletter.


I used the wonderful Dec Birds of a Feather kit full of winter goodness to make this beautiful card along with Imagination Crafts mediums and stencils.


I wanted to add something tot he background to really make it shine and sparkle, but not just more snowflakes.  I used the Grungy Ledger stencil forom Imagination Crafts with the Silver Sparkle Medium and a spatula to create all the wonderful silver sparkle to see.  


http://imaginationcrafts.co.uk/shop/index.php?main_page=index

http://imaginationcrafts.co.uk/shop/index.php?main_page=index

Grungy Ledger


Supplies Used
Cardstock - Bazzill - Dec Birds of a Feather Kit
Pattern Paper - BoBunny & Pink Paislee - Dec Birds of a Feather Kit
Die Cuts - BoBunny  - Dec Birds of a Feather Kit
Foil Stickers - Pink Paislee  - Dec Birds of a Feather Kit
Metal Snowflakes - Maya Road  - Dec Birds of a Feather Kit
Resin Deer - Maya Road - Dec Birds of a Feather Kit
Trim - May Arts - Dec Birds of a Feather Kit
Die Cut Snowflake - Wild Rose Studio  - Dec Birds of a Feather Kit
Snowflake Stickers - Little B  - Dec Birds of a Feather Kit
Glitter - Imagination Crafts
Stencil - Imagination Crafts
Ink - Prima
Adhesive - Tombow & Beacon
Enjoy!!

Monday, January 12, 2015

January Create Magazine Is Live!!

Come check out the amazing new on-line FREE magazine from Create!!  It is just full of amazing projects for some wonderful inspiration!!  Plus is does not hurt that I have a few projects in the magazine too!!

http://issuu.com/sgcreate/docs/create_-_issue_12_-_january_2015

Enjoy!!

My Projects
Beach Layout - 18
Double Layout - 66
Gone Fishing Layout- 174
Christmas Card - 209
Winter Tag - 216
Frosty Layout - 237
Snow Layout - 244

Monday, January 5, 2015

Glittery Gingerbread Ornament Teacher Gifts w/Tutorial **ULD and Imagintion Crafts**

I always love to make something special for all my kids teachers especially for Christmas.  This year it was more about the outside of the gift than the inside, but the inside had some really yummy homemade peanut butter chocolate crunch bars.  We ended up giving these glittery gifts to more than just the kids teachers, we also gave some to the principals at my eldest school.


I used the wonderful 6 piece set of Gingerbread Ornaments from Unique Laser Designs as the base for the for these gifts.  Each ornament comes with its own string to hang up on the tree, they are all unique, really perfect just on their own, but I decided to glitter them up using the wonderful Sparkle Medium from Imagination Crafts in Royal Purple, Amber, and Golden Bronze!!  Below is a tutorial on how to glitter these fun little ornaments with this amazing Sparkle Medium.

http://www.uniquelaserdesigns.com/#!christmas/cbte


http://imaginationcrafts.co.uk/shop/index.php?main_page=index&cPath=156_194
 http://imaginationcrafts.co.uk/shop/index.php?main_page=index&cPath=156_194
 http://imaginationcrafts.co.uk/shop/index.php?main_page=index&cPath=156_194
 
Techniques for Glittering Intricate Chipboard or Wood

1) Start with the chipboard or wood of your choice (these are wood).  I used these cute little Gingerbread ornaments, but as you can see there are lots of cutouts in the men, and that is what gives them their charm, but hard to glitter without getting in all the crevasses.  Below are some tips.


2) If you just do a light coat with the glitter (like below), it looks great, but for these gifts I wanted a complete coverage so I needed to apply a thick coat of Sparkle Medium to the entire surface.


3) Once you apply the thick coat of sparkle medium with a foam brush it covers up most of the details of the ornament, but that is an easy fix!!  Hint- only do one side of the ornament at a time so it has time to dry and not smudge.


4) Using needle, thumb tack, paper piercer, or other long thin object (I used my paper piercer and cleaned it up really well after) poke the tip into the holes of your object to scrape out the extra glitter inside.  You may have to do this a few times in the front and back of each hole, wiping away the extra that builds up with the foam brush.  This step takes some time, but really worth it in the end.


5) It takes about 2-3 hours to dry due to the thick layer or glitter medium applied, but they look amazing when they are done.  They are now super sparkly and perfect for these gift bags.


6) I used plain lunch bags as the base for the gifts.  I filled the bags with the yummy homemade treats, folded over the top a couple of times (squeezing out the air) and stapled it at the top.  I then took a hole punch and punched 2 holes at the top and used green satin ribbon and laced it through the holes tying a simple bow lacing the ornament string in as I tied the bow and let it hang down the bag.


These gifts are filled with homemade goodies, topped with a homemade glittery ornament, and place in a homemade gift bag.  It is a simple gift, but it is one from the heart to show my kid's teachers just how much I appreciate them.  When I taught the best presents given to me were the ones that were made not just a simple gift card, it meant so much more that the parent or student took the time to create something for me - straight from the heart, and years later those are the presents I remember and still have!!


Supplies Used
Ribbon - May Arts
Foam Brush - Plaid
Paper Bag
Hole Punch
Staples
Paper Piercer
Enjoy!!

Thursday, January 1, 2015

Ornament Mini Books **Birds of a Feather & Imagantion Crafts**

I always struggle to find a fun gift for both sets of grandparents each year.  I love to make them mini books of some kind including pictures of each of the kids from that year, a kind of year end review of sorts.  This year it is a chipboard book with a ring clip I found from $.25 at the end of last year. 


I used the wonderful December Birds of a Feather Kit to create this mini book.  Using black and white pictures just made this whole book work with the wonderful cool colors in the kit.

December 2014 Kit-december snow bobunny bo bunny glitter prima maya road ribbon raffia pink paislee


Under each picture I used a foil sticker from the kit, it was just the perfect little added touch for to go with the papers, mist, and picture.


Around the edges of all the pages front and back I applied the wonderful Sparkle Medium from Imagination Crafts in Royal Purple which has this beautiful blend of purple and gold.  I used my finger to just roughly smear it along the book to give each page a finished look. 


http://imaginationcrafts.co.uk/shop/index.php?main_page=index
 
I also added a bit of the Sparkle Medium to the white title "Reed" to help it pop and blend the colors of the project together.
 
I love these wonderful little books, but I always have problems covering them to fit the funky shape they come in. I know I can trace the shape onto paper and cut it out, but then do I cut out 20 of these pages to fit front and back for both books, heck no, not my style!  The December Birds of a Feather Kit had this wonderful spray mist from Prima in this lovely Ice Blue color, and how easy is to spray each side of the chipboard and be done, now just to add in some background shapes to the pictures in squares, circles, or rectangles (super easy to cut)!  Plus the pump grip spray made it even easier to apply to lots of items!


Here you can see the difference from the plain chipboard to the covered one.  You can also see the white paper now turned blue from the spray, of which the chipboard does not look as blue, but the shine and glitter show up wonderfully, just like a glittery ornament ball!!

color bloom


I love to give away these handmade books to the grandparents, and they love getting them.  I already gave these gifts away and both sets of grandparents pawed through them, showing me the basket or shelf they have kept all the books from the past 8 years.

Supplies Used
Chipboard Book - Recollections
Paper - BoBunny - Dec Birds of a Feather Kit

Share This

Related Posts Plugin for WordPress, Blogger...