Wednesday, August 30, 2017

6 Crafty Tips, Tricks, and Ideas for Using Nested Wafer Thin Dies

I love dies, they are so versatile and useful for all kinds of crafts using paper and more!!  Here are 6 tips, tricks, and idea for your nesting wafer thin dies.


Here is a video tutorial for each step below in more detail.


1. Basic Cuts

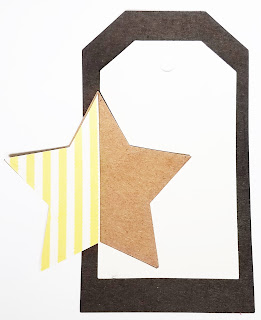
You can use you die to create basic cuts with any of your die cutting machines.  Here is a simple tag example.


2. Thin Layered Cuts

You can nest the dies into each other to create thin cuts and then stack them into each other for a fun effect.


3. Window Cuts

Cut into a card with a shape to make a window.


4. Partial Cuts

Off center the die to make a partial cut, then you can layer it back into itself for a fun look!


5. Embossing

Use the reverse side of the die to create a light embossed look.  You can also take a pen and outline each shape for a more dramatic effect.

6.  Stacking Shapes

Cut out shapes of different sizes from the nested dies and stack them on top of each other for a really fun effect.


Nested dies are really the most versatile dies out there, so many possibilities for creating all kinds of amazing paper crafts.  What will you create next?


Supplies Used
Interested in the supplies I used in this project?  Most are listed below and some are affiliate links, which generates a me little commission (at not extra cost to you at all) when you click on the link and make a purchase.  Affiliate and product disclosure can be found here.

Cuttlebug
Cuttlebug
Shop at:
AZ
Cuttlebug Plate C
Cuttlebug Plate C
Shop at:
SB | AZ
Brutus Monroe Stamps
Shop at:
SB | BM
Tag Nesting Dies
Tag Nesting Dies
Shop at:
SB
Star Nesting Dies
Star Nesting Dies
Shop at:
SB
Black Ink
Black Ink
Shop at:
SB
Adhesive Runner
Adhesive Runner
Shop at:
SB
Stamp Block
Stamp Block
Shop at:
SB

Tuesday, August 29, 2017

Seashells on a Canvas - Found Shells Inked into Art

I recently went to the beach, and while I was there I found some amazing shells.  I collected a ton and cherry picked the best of the best to use on my project!


Here is a video tutorial on how I made this Shell Mixed Media Art Canvas.


I love how the gold embossing powder looks on the inked shells.  The grid of the pieces is a fun way to show the four shells and their beauty.  Added in some Mudd Puddles sand and other shells to the pieces to bring it all more to life of the feel of the beach.


I love having a reminder of my time at the beach. a lovely work of art for my home.


Supplies Used
Interested in the supplies I used in this project?  Most are listed below and some are affiliate links, which generates a me little commission (at not extra cost to you at all) when you click on the link and make a purchase.  Affiliate and product disclosure can be found here.


Helmar 450 Quick Dry Adhesive
Shop at:
AZ
Fiskars 5 Inch Titanium Micro-Tip Easy Action Scissors
Shop at:
AZ
Gold/Gold Glossy Foiled Paper Crafters Pack
Shop at:
R
Gold/Gold Star Struck Foiled Paper Crafters Pack
Shop at:
R
ColoriQue
ColoriQue
Shop at:
O
Clearsnap Archival Ink
Shop at:
SB | AZ
Colorbox Paintbox Ink
Shop at:
AZ
Colorbox Crafters Ink
Shop at:
AZ
CCB 12 in Canvas
CCB 12 in Canvas
Shop at:
AZ
CCB Rope
CCB Rope
Shop at:
AZ
Mudd Puddles
Mudd Puddles
Shop at:
O
CCB Burlap Sheet
CCB Burlap Sheet
Shop at:
AZ
Clearsnap Embossing Ink
Shop at:
AZ
Gold Embossing Powder
Shop at:
AZ

Sunday, August 27, 2017

Make Trash to Treasure by Upcycling Jars into Autumn Votives

I love to use empty jars to create and upcycle into my crafty projects.  I have saved two empty brown yeast jars and thought they would be amazing to etch with the Etchall Creme.  Add a little extra paint, raffia, and some glue and I have a pair of cute etched jars I can use as votives or as candy jars!


Here is a video on how to create these fun jars.


I stared with a pair of empty brown yeast jars, cleaned off the labels, and then did simple lines to complete the etching.  The etching work amazing on the brown glass jars!


I then painted the jar lids in a pretty green, added a painted cork to the tops, and added a bit of raffia to finish it all off.


I love to turn trash into treasure, and now I have a pair of beautiful autumn jars with just a few simple steps!

Supplies Used
Interested in the supplies I used in this project?  Most are listed below and some are affiliate links, which generates a me little commission (at not extra cost to you at all) when you click on the link and make a purchase.  Affiliate and product disclosure can be found here.

Squeaky Clean™ Stamp Cleaner - Brutus Monroe
Shop at:
BM
Fiskars 5 Inch Titanium Micro-Tip Easy Action Scissors
Shop at:
AZ
Helmar Fabric Glue
Helmar Fabric Glue
Shop at:
BM
Etchall Creme
Etchall Creme
Shop at:
AZ
Etchall Squeegee
Etchall Squeegee
Shop at:
AZ

Thursday, August 24, 2017

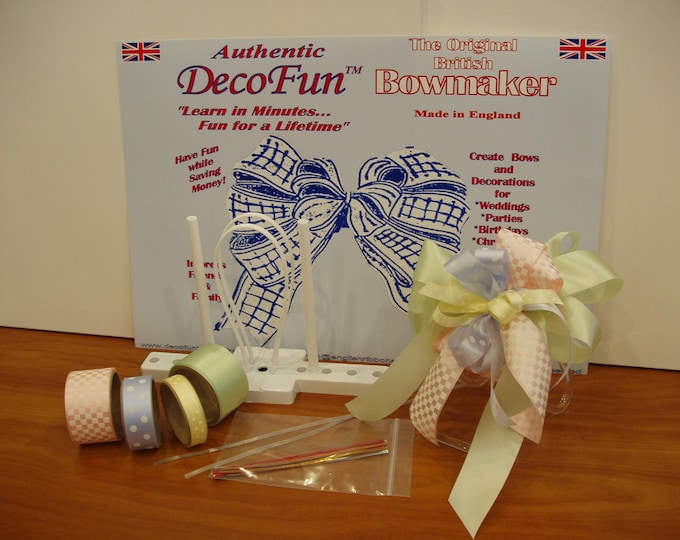
Cute DIY Hairbows with DecoFun Bowmaker

I have all these hair bows left from when my daughter was a baby, they are so cute but really tiny.  So why not spruce them up and make them a bit bigger, plus she can pick out the ribbon she wants her bows in!!


Here is a video on how to make these easy hair bows!!


I love how easy these bows are to make with the DecoFun Bowmaker.  A little glue and you are all set!!  Here is the first one in pink!


I layered 2 sizes of bows, a smaller one over a larger one, and then glued a cute little flower to the center to finish it all off!  Here is the second in blue.


Both bows are glued to the old hair bow clips, I just ripped of the old ones and glued the new bow to it.  So easy!!!


Here is my unboxing video and use of the larger bow options!


Make sure to check out all the other designs by the rest of the Designer Crafts Connection members and how they all used the DecoFun Bowmaker on the DCC blog!!

http://designercraftsconnection.blogspot.com/

Supplies Used
Interested in the supplies I used in this project?  Most are listed below and some are affiliate links, which generates a me little commission (at not extra cost to you at all) when you click on the link and make a purchase.  Affiliate and product disclosure can be found here.


Fiskars 5 Inch Titanium Micro-Tip Easy Action Scissors
Shop at:
AZ
Helmar Fabric Glue
Helmar Fabric Glue
Shop at:
BM
DecoFun Bowmaker
DecoFun Bowmaker
Shop at:
O
Prima Flowers
Prima Flowers
Shop at:
AZ
Maya Road Flowers
Maya Road Flowers
Shop at:
AZ


Share This

Related Posts Plugin for WordPress, Blogger...